Help(iOS App)

Return to App

Back

Screen Description / Operation

Back

Bookshelf Screen

Screen Description

Screen Image

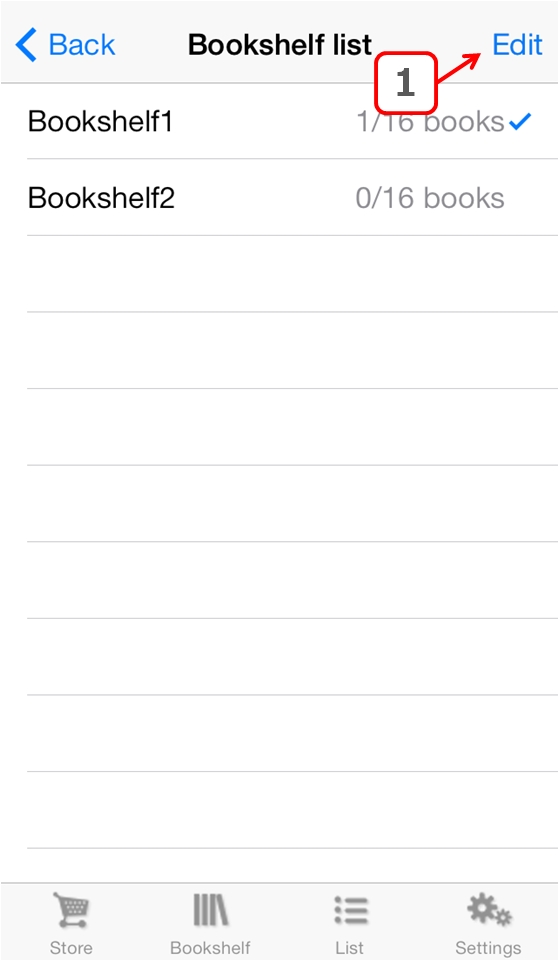
① Bookshelf List button

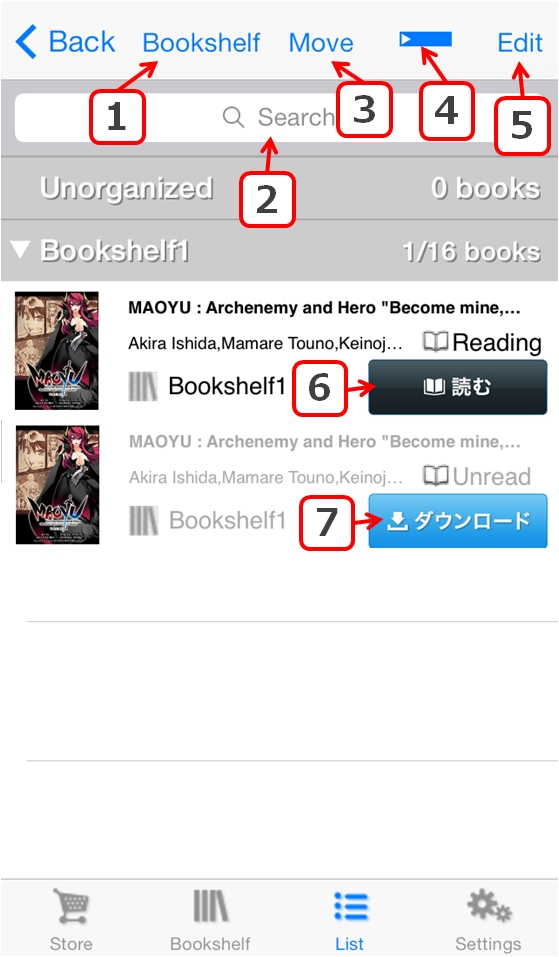
This button opens the Bookshelf List screen. On this screen, you can move the selected bookshelf, add a new bookshelf, sort bookshelves, and delete bookshelves.

② Add Book button

You can add a book to the currently displayed bookshelf with this button.

③ Edit button

After tapping this button, you can change the design of your bookshelf skin or the order of your books.

The "Edit Bookshelf Name / Skin" button
You can change the name or the skin design of the currently displayed bookshelf.
You can also delete unneeded bookshelf skins by clicking on the bookshelf skin's "Delete" button.
- Deleting bookshelf skins -
Run "Restore Bookshelf" on the "Settings" screen to restore to this screen.
If you run "Restore Bookshelf" while the current bookshelf status has not been saved, the bookshelf will return to its initial status, so be sure to run "Save Bookshelf" on the "Settings" page before running "Restore Bookshelf".

Hold down "Cover Image" and drag to move
The books will be reordered on the bookshelf.

Tap "Cover Image"
You can delete the book or change the reading status.

◆Delete books
Delete a downloaded file
Only the downloaded book file is deleted, so the book will remain on the shelf in a non-downloaded state.
Archive
Delete the book from the app and archive it.
Archived books can be re-downloaded and restored to the app from the "Archived Books" button on your My Account in the "Settings" screen.
(1) Open your My Account on the app's "Settings" screen.
(2) Check the book(s) you want on the "Archived Books" screen.
(3) "Retrieve from Archive".
(4) The books checked in step (2) will be restored to the "Unorganized" section of the "List".

◆Change Reading Status
Set to unread
Change the book's reading status to unread.
Set to read
Change the book's reading status to read.

④ Slide bookshelf

You can move to the next bookshelf by flicking to the right or left on this screen.

⑤ List button

This button moves to the book list screen. Books can also be downloaded and browsed here.

⑥ Settings button

You can change the various app settings, such as your sign-ins and saved bookshelves.

Cover Image

Tap "Cover Image"
If the book has not been downloaded, the download will begin. If it has been downloaded, it will be opened.
Back

Bookshlef List Screen

Screen Description

Screen Image

① Edit button

After tapping this button, you can change the bookshelf name or bookshelf order.

Tap "Bookshelf Name"
You can change the name or the skin of the currently displayed bookshelf.
You can also delete unneeded bookshelf skins by clicking on the bookshelf skin's "Delete" button.
- Deleting bookshelf skins -
Run "Restore Bookshelf" on the "Settings" screen to restore to this screen.
If you run "Restore Bookshelf" while the current bookshelf status has not been saved, the bookshelf will return to its initial status, so be sure to run "Save Bookshelf" on the "Settings" page before running "Restore Bookshelf".

Tap "Delete"
You can delete a bookshelf.

Tap the "Add Bookshelf" button
A new bookshelf will be created.

Hold down the 三 symbol
The bookshelf will hover, and you can slide it to the location you want.
Release your finger to drop the bookshelf and set the location.
Back

Book-list Screen

Screen Description

Screen Image

① Sort button

By tapping this button, you can change the sort order of your books to date of purchase, title, etc.

② Search field

The books displayed are filtered by the entered keyword.

③ Move button

Use this button to move to the sorted category.

④ Close/Open button

This button switches cells between show and hide.

⑤ Edit button

Tap this button to download multiple books at once and store them on a bookshelf.
While selecting multiple books:

Tap the "Download" button
You can download the selected books at once.
* Please do not close the app during downloads.
* Please do this in a location with good Internet connectivity.

Tap the "Add to Bookshelf" button
The selected books will be stored on your desired bookshelf.
* Books cannot be added if they exceed the storage limit for the bookshelf.

Tap the "Delete" button
The selected books will be deleted at once.
◆Delete a downloaded file...
Only the downloaded book file is deleted, so the book will remain on the shelf in a non-downloaded state.
◆Archive...
Delete the book from the app and archive it.
Archived books can be re-downloaded and restored to the app from the "View Archive" button on your My Account in the "Settings" screen.
(1) Open your My Account on the app's "Settings" screen.
(2) Check the book(s) you want on the "Archived Books" screen.
(3) "Retrieve from Archive".
(4) The books checked in step (2) will be restored to the "Unorganized" section of the "List".

Tap the [Cover Image] "Cover Image" button.
Switch between showing and hiding the cover image.

⑥ Read button

This button launches browsing of downloaded books.

⑦ Download button

This button starts the download of books that have not been downloaded yet.
Back

Operation by Purpose

Add bookshelf

[From the "Bookshelf" screen]
(1)Tap the bookshelf name.
* When the app is installed, this is displayed as "Bookshelf 1".
(2) Tap "Edit", then "Add Bookshelf".
(3) Enter a bookshelf name, then tap "Done".

[From the "List" screen]
(1) Tap "Edit" and select the books that you would like to store on the newly created bookshelf.
(2) Tap "Bookshelf" and then tap "Add Bookshelf" button.
(3) Enter a bookshelf name, then tap "Done".

Download multiple books at once

(1) Tap "Edit" on the "List" screen.
(2) Select all of the books you want to download.
(3) Tap "Download" at the bottom of the screen.

Change bookshelf skin

(1) Display the bookshelf whose skin to change on the "Bookshelf" screen.
(2) Tap "Edit", then "Name / Skin".
(3) Select the design you like from the list.
*If the skin has not been downloaded yet, the download will start.
(4) Tap "Done".

Sort bookshelves

(1) Tap the bookshelf name on the "Bookshelf" screen
* When the app is installed, this is displayed as "Bookshelf 1".
(2) Tap "Edit" on the bookshelf list.
(3) Hold down the 三 symbol on the right.
(4) When the bookshelf starts to hover, slide it to the location you want.
(5) Release to drop, then tap "Done".
Back

Purchase (Payment)

Payment method

Payment will be processed with your Apple ID.
In addition to credit cards, payments can be made using pre-paid iTunes Cards, sold at convenience stores, authorized Apple resellers, etc.

I could no longer make purchases after creating an iCloud account

When buying products from the eBook store, you need to use the same Apple ID as the one you used when you downloaded the app.
If you change your Apple ID to use iCloud or use a combination of multiple Apple IDs, you may not be able to make purchases on the eBook store.
In that case, please check the state of your previous Apple ID using the procedure below.

(1) Look up the Apple ID you used in the eBook store (On a PC, launch iTunes, sign-in, go to "Account Information" and "Purchase History")
(2) Access https://appleid.apple.com/ and click "Manage Accounts"
(3) The sign-in screen will be displayed. Enter the account and password you use with your iCloud account.

If you have any questions about how to use or change your Apple ID with iCloud, please contact Apple Support below.
http://www.apple.com/jp/support/contact/
Back

Delete & Re-download

Delete & Re-download

Take book out of bookshelf

You can take stored books out of your bookshelf.
Books that were taken out will be stored in the "Unorganized" section on the "List" screen.

Taking a book out of the "List" screen
(1) Tap "Edit" on the app's "List" screen.
(2) Select books to take out then select "Bookshelf" from the bottom of the screen.
(3)Select "Unorganized".
Taking a book out of the "Bookshelf" screen
(1) On the app's "Bookshelf" screen, open the bookshelf where the book you want to take out is stored.
(2) Select "Add Book" from the top.
(3) Deselect the book you want to take out and select "Add".

How to delete books

There are two applications for the delete function.

Delete a downloaded file
With this operation, only the downloaded book file is deleted, so the book remains in the app in a non-downloaded state.
By doing this, you can increase the amount of free space on your device.
Archive
With this operation, the book is deleted from the app, and archived.
Archived books can be accessed from the "Archived Books" button on your My Account any time and restored to the app.

◆How to run the delete function.
[If running on the "List" screen]
(1) Tap "Edit" on the app's "List" screen.
(2) Select the books to delete then select "Delete" from the bottom of the screen
(3) Select either "Delete Downloaded File" or "Store in Archive", and then select "Done".

[If running on the "Bookshelf" screen]
(1) On the app's "Bookshelf" screen, open the bookshelf where the book you want to delete is stored.
(2) Select "Edit" from the top right.
(3) Tap the book, select either "Delete Downloaded File" or "Store in Archive", and then select "Done".

Take a book out of the archive (Restore within the app)

(1) Go to your "My Account" from the app's "Settings" screen.
(2) Select the "Archived Books" button under Manage Archive
(3) Check the book(s) and select "Retrieve from Archive" at the bottom of the screen.

This process will restore the books to the "Unorganized" section of the app "List".

Re-download a deleted book

Books deleted using "Delete Downloaded File"
These books can be re-downloaded with the "Download" button on the "List" screen or by tapping the book on the "Bookshelf" screen.

Books deleted using "Archive" (*)
(1) Go to your "My Account" from the app's "Settings" screen.
(2) Select the "Archived Books" button under Manage Archive.
(3) Select the book(s) then select "Retrieve from Archive" at the bottom of the screen.
(4) The books from step (3) are restored to the "Unorganized" section of the "List" screen, and can be accessed with the "Download" button.
(*) On apps from before version 3.6.6, this option is displayed as "Delete from List".

● Deleted books can always be re-downloaded for free if using the same account.

-->
Back

Sharing Information Between Devices

Sharing a variety of history information between devices

The app history can be shared across Android and iOS (iPhone, iPad, iPod Touch).
* To share history between devices, you must sign-in using the same account.

To share purchase history

If you display the "List" screen while signed in, it will automatically be shared.

To share bookshelves

  • Settings>Running Save Bookshelf will save the bookshelf information for the current bookshelf on the server.
  • Settings>Running Restore Bookshelf restores the bookshelf information as it has been saved on the server.

To share bookmarks and sticky notes

  • SettingsAuto Sync SettingBookmark Auto Sync / Sticky Note Auto Sync is turned on, the locations you have read and sticky notes you have posted will be saved and shared on the server.
    * Some things may not be saved in locations with poor Internet connectivity.

About sharing history

  • Even when using the same account, there is a limit to the number of shared devices.
  • If you exceed the limit for shared devices, you can reset the share authentication for devices you no longer use. (The procedure for this will be displayed when you reach the limit.
  • Once you reset your authentication, you cannot reset it again for a specific period of time. (This period of time changes depending upon your usage, etc.)
    If you would like to reset again during this period, please Support. (We may ask you for the reason for your request. Thank you for your understanding.)
Back

E-mail News / Cancel Membership

E-mail News / Account

Back

Contact Us

Contact Us

If you are unable to solve your problem using the Help menu, please contact us using the following form.
The reply to your inquiry will be sent from the "mail.bookwalker.jp" domain. If you are using mobile phone-based e-mail, please set your mail settings to allow mail from this domain to be received.

Support Hours
Monday - Friday 9:00 - 16:00 JST (Excluding Japanese Public Holidays, and Summer/Winter Holidays)
*Our support service is basically offered by e-mail. Thank you for your understanding.
Members click here If not a member, please send an e-mail to the address below.


* The e-mail address is displayed as an image to prevent spam. Thank you for your understanding.